The Polestar 2 has an unusual body style: a notchback sedan that's been slightly lifted. Someone probably calls it a crossover because marketing, but whatever the body style in total is, Polestar Part Deux has a trunk covered by a liftback that encompasses both the vestigial "third-box" of a trunk lid and the rear glass. It's what an Audi A7, Kia Stinger or any number of European "5-door" sedans have.?
According to the specs, that trunk has 14.3 cubic-feet of volume, which isn't that great for a 5-door. The Audi A5 Sportback has 21.8 cubic-feet; the Stinger has 23.3. Although I've luggage tested various hatchbacks and crossover-coupe things (including the Mustang Mach-E and E-Tron Sportback), this is the first notchback/5-door sedan I've done, so we'll just have to make do without apples-to-apples here.

Yep, it's a trunk. But before I start piling in the luggage, lets take a look at two key features.

First, this handy pop-up partition makes the cross-Gothenburg jump from Volvo to Polestar. It's a brilliant solution to prevent groceries from flying all around your trunk.
Something else that might be handy in that endeavour ...


Lifting up the floor panel reveals a surprisingly large amount of bonus space, more so than what you'll find in the E-Tron and Mach-E. It's roughly the size of this duffle bag, so from here on out, add this guy to whatever amount I'm able to stuff in side.
Speaking of which, as in every luggage test I do, I use two midsize roller suitcases that would need to be checked in at the airport (26 inches long, 16 wide, 11 deep), two roll-aboard suitcases that just barely fit in the overhead (24L x 15W x 10D), and one smaller roll-aboard that fits easily (23L x 15W x 10D). I also include my wife's fancy overnight bag just to spruce things up a bit (21L x 12W x 12D). The blue duffle bag and the small, black, triangular-ish carry-on are bonus ones I use at times to fill in blanks (or fill extra-small spaces like the Polestar 2's trunk hole).
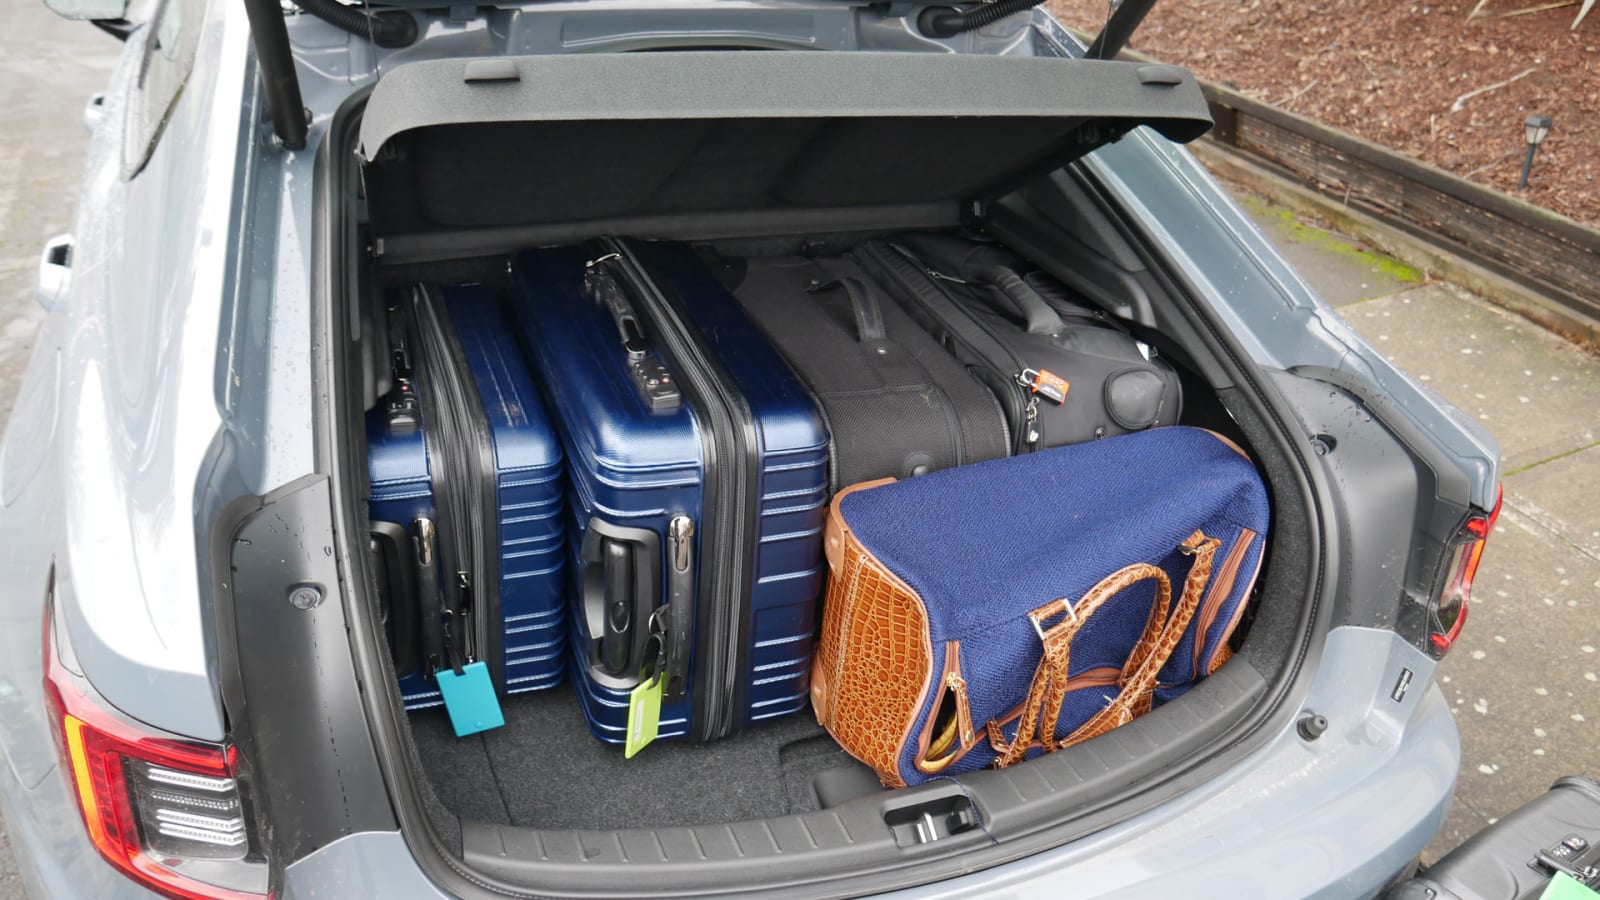
Here's the best I could do with the rigid cargo cover in place: all but the biggest roller bag. Four do fit width-wise, though, which is better than the Cadillacs CT4 and CT5 can manage.?

Here is that cargo cover. It's a typical rigid hatchback piece that you'll have to have the forethought to remove before max capacity can be used. It's the dreaded scenario of, "I'm picking people up at the airport, and they have way more stuff than I expected" (or if you prefer the alternative, "I'm picking people up at the airport, and I forgot to remove the damn cargo cover."
Once again, let's give a shout-out to the Mustang Mach-E for its simple and effective solution to this problem.?
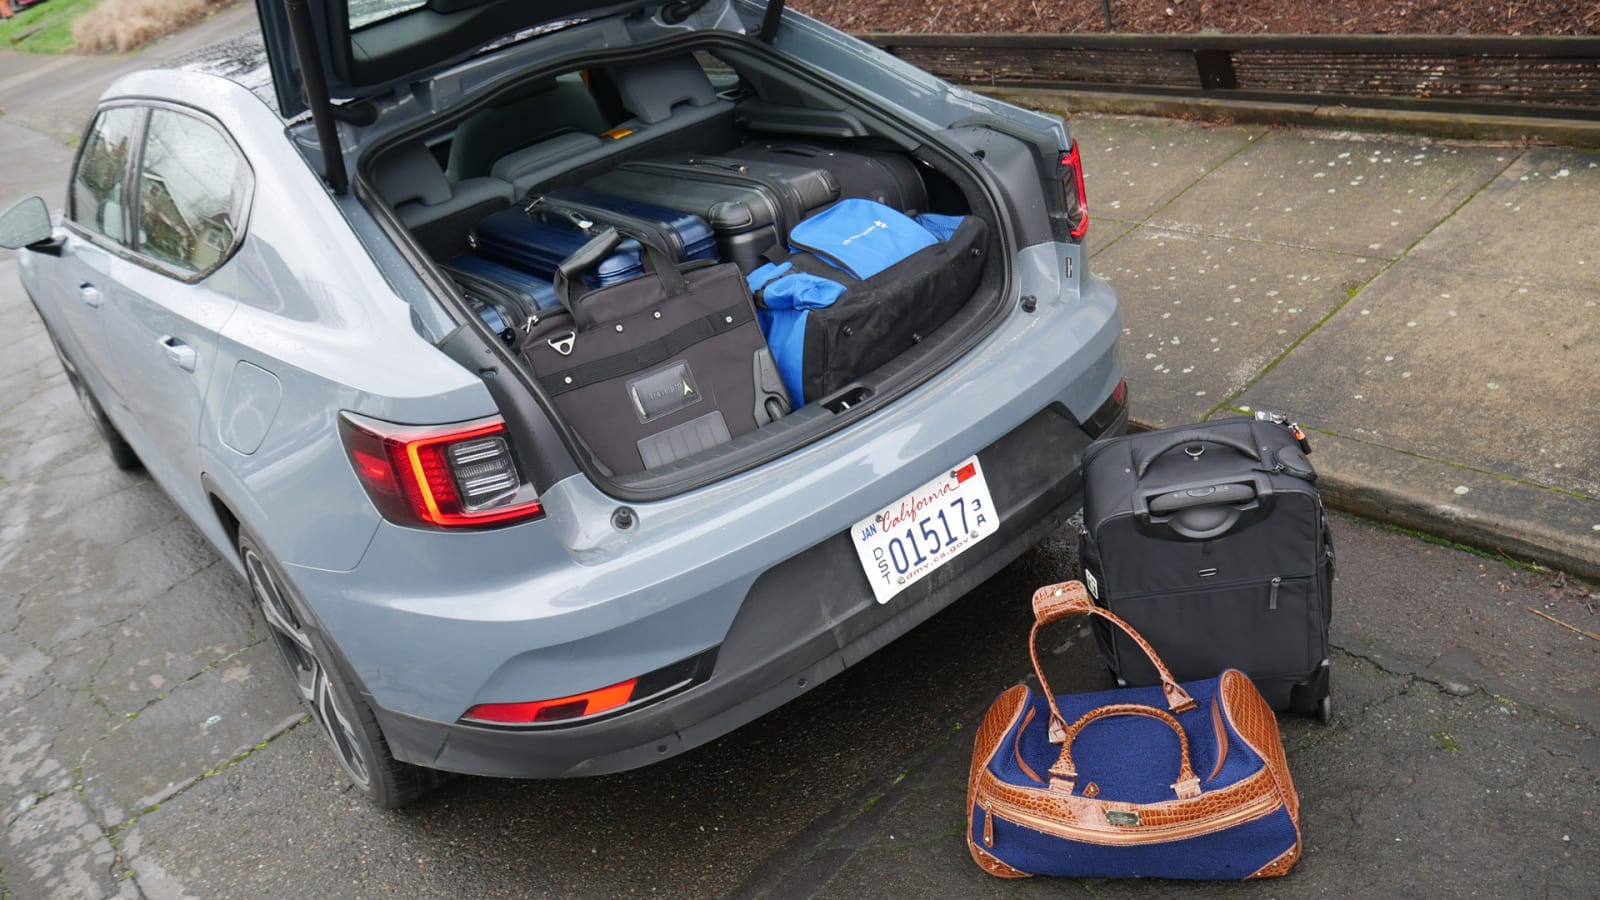
So here it is maxed out. One of the medium bags and fancy bag couldn't fit, but the little black triangle bag and the blue duffle bag can fill in the blanks. Plus there's that other blue duffle bag hidden below.
This is less than you'd expect from a 14.3-cubic-foot trunk, but keep in mind, that volume goes to the roof/glass in a notchback/5-door like the Polestar 2. You can theoretically use the extra "air space," particularly for bigger, bulkier items, but stacking smaller items atop the luggage here would be problematic for a number of reasons. First, even the fancy bag was too big to fit up there. Second, you'll be blocking the view rearward, which I avoid doing in these tests. Third, and most important, you run the risk of something flying forward into the cabin when braking. We should all avoid having that happen.?
Going back over some past luggage tests of sedans, I'd wager the usable trunk area is something like 12 cubic-feet, with bonus space above, below and ...
![]()

... In the frunk! It's pretty small up there, smaller in fact than the underfloor storage in back. The little triangulish bag only kinda fit. Probably best to just stick the charge wire in there, or here's a thought ... how about EV makers start figuring out a way to put a space-saving spare up front? People are unlikely to use the frunk much, and it's not unheard of for cars to have their spares up front. I can think of the Yugo and original Acura NSX as two widely disparate examples.
And yes, cars should have spares. Run-flats are expensive and deliver problematic rides, cans of goo and air compressors are barely solutions, and do you really want to call and wait for AAA just to change a tire?
Again, just a thought.?